
Table of Contents
- What You’ll Need Before You Start
- How to Prepare a Vehicle Undercarriage for Coating
- Step-by-Step: Applying Undercoating Without the Mess
- Wax-Based vs Oil-Based Undercoating: Which Makes Less Mess?
- Professional Undercoating vs DIY: What Changes the Mess Factor
- How Long Does Professional Undercoating Last?
- Common Mistakes That Cause Messy Car Undercoating
- Conclusion
- Frequently Asked Questions
Last Updated: September 25, 2026
What You’ll Need Before You Start
Avoiding messy car undercoating comes down to prep and aim, not the coating. This guide from Corrosion Pro Plus covers masking to curing so you can protect your undercarriage without coating your garage floor.
Gather these items before you begin:
- Jack stands or a lift, plus wheel chocks Jack Stands
- Pressure washer and a degreaser
- Salt Neutralizer
- Wire brush and sandpaper for rust spots
- Masking paper, plastic sheeting, and painter’s tape
- Safety glasses, nitrile gloves, and a respirator
- Undercoating gun with an adjustable nozzle
- Drop cloths and cardboard for floor coverage
How to Prepare a Vehicle Undercarriage for Coating
Preparation decides whether the job stays clean: a dry, degreased surface holds coating; a dirty one drips.
Cleaning, Degreasing, and Drying the Undercarriage
Pressure wash road grime from the frame rails, wheel wells, and suspension, then degrease any oil or transmission fluid residue. Finish with a salt neutralizer to remove and Chloride residue
Masking and Protecting Sensitive Components
Cover everything that should not receive coating to prevent the worst mess: overspray on parts that must stay clean.
Mask these areas:
- Exhaust components and catalytic converters
- Suspension bushings and CV boots (Only if using oil)
- Brake Hose and Fuel Lines (Only if using Oil)
- Electrical connectors and sensors
- In the case of Corrosion Pro Plus, much of this masking is unnecessary because our techs have special applicator tools and years of experience.
Step-by-Step: Applying Undercoating Without the Mess
Clean technique beats expensive equipment. The mess comes from three variables, gun setup, product temperature, and work sequence. Get those right and the job stays contained.
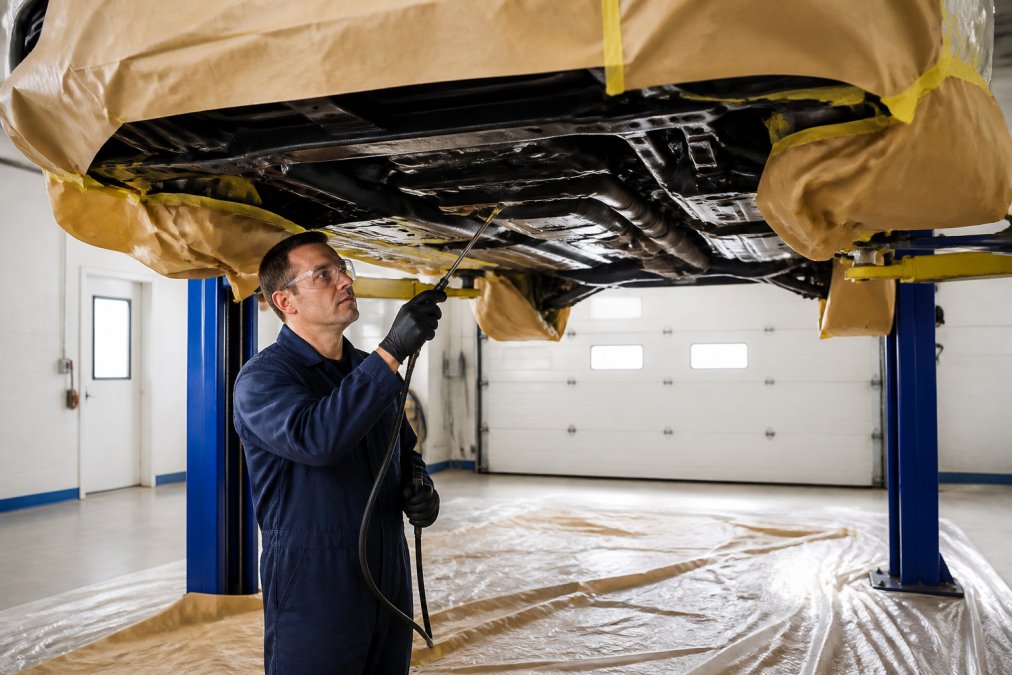
Set Up the Gun Before You Touch the Vehicle
Most undercoating guns are inexpensive air-powered units with two adjustments: fluid flow and air pressure. Both matter more than the brand of coating.
- Air pressure: Most wax-based and rubberized coatings spray best between 40 and 60 PSI at the gun. Too low and the product sputters globs; too high and it atomizes into a fine mist that drifts onto everything you masked.
- Fluid flow: Start with the needle about one and a half turns out from closed. Open it further only if the pattern is starved.
- Pattern test: Spray a two-second burst onto cardboard from your intended working distance. You want a fan roughly 4 to 6 inches wide with no heavy center stripe and no spitting.
Warm the Product and the Surface
Cold coating is thick coating, and thick coating drips. Most manufacturers recommend bringing the product to roughly 65 to 75°F before spraying; in cold weather, set cans in a warm (not hot) water bath for 15 to 20 minutes. Never heat coating over an open flame, many formulas contain solvents with low flash points.
Sequence the Work to Contain the Mess
Order of operations separates a clean job from a driveway disaster:
- Ventilate first. Open the garage door and place a box fan at the rear, blowing out. This pulls overspray and solvent vapor away from you and off nearby surfaces.
- Mask completely before mixing anything. Once the gun is loaded, you lose the patience to mask properly.
- Lay floor protection under the full length of the vehicle, drop cloths plus a layer of cardboard. Cardboard absorbs drips and is disposable.
- Start at the farthest point and work toward the door. This keeps you from walking through fresh overspray.
- Do frame rails first, then wheel wells, then floor pans. Frame rails are the easiest to reach and give you a feel for the gun before you move to awkward angles.
- Keep the nozzle 8 to 12 inches from the surface and perpendicular to it. Angled spraying is the number one cause of overspray on exhaust and suspension.
- Overlap each pass by about half the spray width. This gives full coverage without the buildup that sags.
- Apply thin coats and let each flash, typically 10 to 20 minutes for wax-based products, before adding the next. Two thin coats beat one heavy coat every time.
- Move at a steady pace. Stopping mid-pass leaves a thick blob that runs.
Handle Drips and Overspray While They’re Still Wet
Even careful applicators get the occasional drip. The fix is speed, not technique.
- On the floor: Blot with cardboard or an absorbent rag. Do not wipe sideways, which smears the coating into a wider stain.
- On exhaust or suspension: Wipe with a solvent-dampened rag, then follow with a clean rag. Avoid spraying solvent directly onto rubber bushings or brake lines.
- On your skin: Most undercoating formulas are removed with the same solvent listed on the label, followed by soap and water. Check the SDS before you start.
- On concrete: Fresh drips come up with solvent and a stiff brush. Once cured, you’re looking at mechanical removal, a scraper, wire brush, or in stubborn cases a pressure washer with a rotating nozzle.
Curing, Dry Time, and Driving After Application
Most coatings need several hours to become touch-dry and a day or more to cure. Humidity and temperature change these times, so check the product label.
If the Job Still Goes Wrong: Removing Messy Undercoating
This is the step most guides skip. If you already have overspray or a lumpy, drippy finish, you don’t have to live with it.
Does ALL of this sound like too much work?? It is!
- Fresh overspray (still tacky): Wipe with the solvent named on the product label. Mineral spirits work for many wax-based products; check the SDS first.
- Cured overspray on metal: A plastic scraper removes most of it without scratching. Follow with a wire brush or a nylon abrasive pad.
- Cured overspray on rubber or plastic: Solvents can swell or crack these materials. Use a plastic razor blade and patience rather than chemistry.
- Excess coating on the chassis: A heat gun softens cured undercoating enough to scrape in manageable sections. Work in a ventilated area and wear a respirator, aged coating dust can contain rust particles and old solvents.
- Runoff and disposal: Never wash undercoating residue into a storm drain. Most communities classify it as household hazardous waste. Collect runoff on cardboard or absorbent pads and dispose of it at a local household hazardous waste facility. Check your state or county environmental agency for the drop-off site nearest you.
Wax-Based vs Oil-Based Undercoating: Which Makes Less Mess?
Wax-based coatings make far less mess than oil-based products: they dry to a firm, waxy film that resists drips and doesn’t stay tacky.
|
Feature |
Oil-Based |
|
|---|---|---|
|
Dry time |
Sets firm in hours |
Stays wet for days |
|
Drip risk |
None after curing |
High |
|
Seam creep |
Good Warmer the better |
Excellent |
|
Dust pickup |
Minimal |
Heavy |
|
Best for |
Clean, lasting finish |
Deep cavity penetration |
Professional Undercoating vs DIY: What Changes the Mess Factor
Professional undercoating removes most of the mess because the work happens in a controlled bay with a lift, ventilation, and trained hands. DIY saves money but puts the cleanup on you.
How Long Does Professional Undercoating Last?
Professional undercoating typically lasts several years, and some applications hold up far longer. Longevity depends on the product, the prep, and how much salt the vehicle sees. Wax-based treatments from a trained applicator can protect a chassis through many winters, and a one-time application means skipping the yearly driveway re-spray, less downtime and less mess over the life of the vehicle.
Common Mistakes That Cause Messy Car Undercoating
Most messes trace back to a handful of avoidable errors. What separates a clean job from a disaster is understanding why each mistake causes a mess, and which are specific to your vehicle.
Application Mistakes and How to Fix Them
- Spraying over rust. Coating traps moisture under flaking metal, so the panel rusts from underneath and the coating blisters off in sheets. Fix: wire-brush loose rust to bare metal, treat with a rust converter, then coat.
- Skipping the degreaser. Oil and transmission fluid stop adhesion. The coating slides, sags, and drips. Fix: pressure wash, then degrease, then dry completely before spraying.
- Blocking weep holes. Water pools inside rocker panels and doors, rusting them from the inside. Fix: identify every weep hole before masking and stuff them with rolled paper towel you can pull out after the coating sets.
- Holding the nozzle too close. Thick blobs sag and drip. Fix: stay 8 to 12 inches back and overlap passes by half.
- No floor protection. Overspray ruins concrete and driveways, and cured undercoating on concrete is a mechanical-removal job. Fix: drop cloths plus cardboard under the full length of the vehicle.
- Driving too soon. Wet coating picks up road grit and sprays back onto the chassis. Fix: wait until the surface is dry to the touch.
- Ignoring ventilation. Solvent fumes linger and pose a health risk. Fix: open the garage door and run a fan blowing outward.
Vehicle-Specific Mistakes Most Guides Ignore
The right technique depends on what you’re coating. Applying the same approach to every vehicle is itself a common mistake.
Modern EVs and hybrids:
- Coating over high-voltage cabling or battery cooling lines. These run along the floor pan on many EVs. Mask them completely, overspray on a high-voltage connector is a safety issue, not just a cosmetic one.
- Assuming there’s a traditional exhaust to mask. EVs have no exhaust, but they do have battery thermal management lines and underbody aero panels that should be removed or masked rather than sprayed over.
- Spraying over underbody shields. Many EVs use plastic or composite shields for aerodynamics. Coating them adds weight, traps moisture against the panel, and looks terrible. Remove them, coat the metal underneath, then reinstall.
Older combustion vehicles:
- Coating over existing rubberized undercoating. If the factory coating is cracking or peeling, new coating won’t bond. Remove loose material first.
- Spraying near fuel and brake lines that have surface rust. Coating hides the rust instead of stopping it. Inspect and replace compromised lines before coating.
- Ignoring the spare tire well and jack points. These collect salt and are easy to miss. They’re also the first places rust shows up.
Environmental and Disposal Mistakes
This is the part almost no guide covers, and it’s where DIYers create the biggest long-term mess.
- Washing runoff into a storm drain. Undercoating residue, solvents, and degreaser runoff are not stormwater. Most municipalities classify them as household hazardous waste. Collect runoff on cardboard or absorbent pads.
- Disposing of solvent-soaked rags in the trash. Many undercoating solvents are flammable and can spontaneously combust in a sealed bin. Spread rags flat to dry outdoors, then dispose of them per your local household hazardous waste rules.
- Spraying outdoors on a windy day. Overspray drifts onto driveways, siding, and neighboring vehicles. If you must work outside, tent the area with plastic sheeting and work on a calm day.
- Leaving unused coating in an open container. Most formulas skin over and become unusable. Seal the container per the label and store it according to the SDS.
Conclusion
A clean undercoating job comes down to prep, aim, and patience. Mask the sensitive parts, keep the nozzle at the right distance, and let the coating cure fully before you drive. If all this seems like too much work, then Call Corrosion Pro Plus 585-235-RUST
Frequently Asked Questions
What are the most common causes of messy or dripping undercoating?
Drips usually come from three things: spraying over a wet or greasy surface so the coating can’t bond, holding the nozzle too close or moving too slowly, and applying a heavy coat in one pass instead of several thin ones. Skipping masking also sends overspray onto brake rotors, exhaust parts, and paint. Fix the prep and technique and most of the mess disappears.
Can you drive immediately after a professional undercoating service?
In most cases you can drive shortly after a professional application, but the coating still needs time to cure fully. Plan on keeping the vehicle out of heavy rain and away from pressure washing for at least 24 to 48 hours, and longer in cool or humid conditions. Wax-based products stay soft longer, so follow the shop’s specific dry-time guidance before exposing the undercarriage to road spray or salt.
How long does professional undercoating last compared to DIY applications?
A properly applied professional wax-based coating can protect a vehicle for several years, and some come with corrosion guarantees of up to 10 years when the product and prep are done correctly. DIY spray cans and brush-on kits often need reapplication every season or two because thin spots, missed seams, and poor adhesion let moisture in. Prep quality and product type matter more than the brand name on the can.
Is it possible to remove excess or messy undercoating from a vehicle?
Yes. Fresh overspray wipes off with the solvent recommended on the product label. Once cured, excess coating on exhaust parts, brake components, or painted panels can be softened with a dedicated remover, scraped with a plastic blade, and cleaned up with a degreaser. Never chip at brake lines, fuel lines, or wiring. If a shop applied the coating badly, have a professional assess what can be safely removed.